

The 2025 Boston Marathon Course Guide - Imperial Edition (Miles & Feet)
We're shipping up to Boston, whoa.

Notes: This guide is based on a Run Ready Certified GPX file, created through a standardized process that combines official course maps, measurement certificates, and other plotting techniques. The official course distance is 26.2 miles, which is the shortest possible route while staying within the course boundaries. The certified GPX file measures the course at 26.24 miles, so distances in the guide are approximate. Additionally, and as shown below, different platforms will calculate different totals from the same set of coordinates.
This is the Imperial Edition (Miles & Feet) of the course guide. The Metric Edition (Kilometers & Meters) is coming soon.
Course Overview
The Boston Marathon, the world's oldest annual marathon and a bucket-list race for runners around the globe, will take place on April 21, 2025. This year's event holds special significance as it coincides with the 250th anniversary of Patriots' Day.
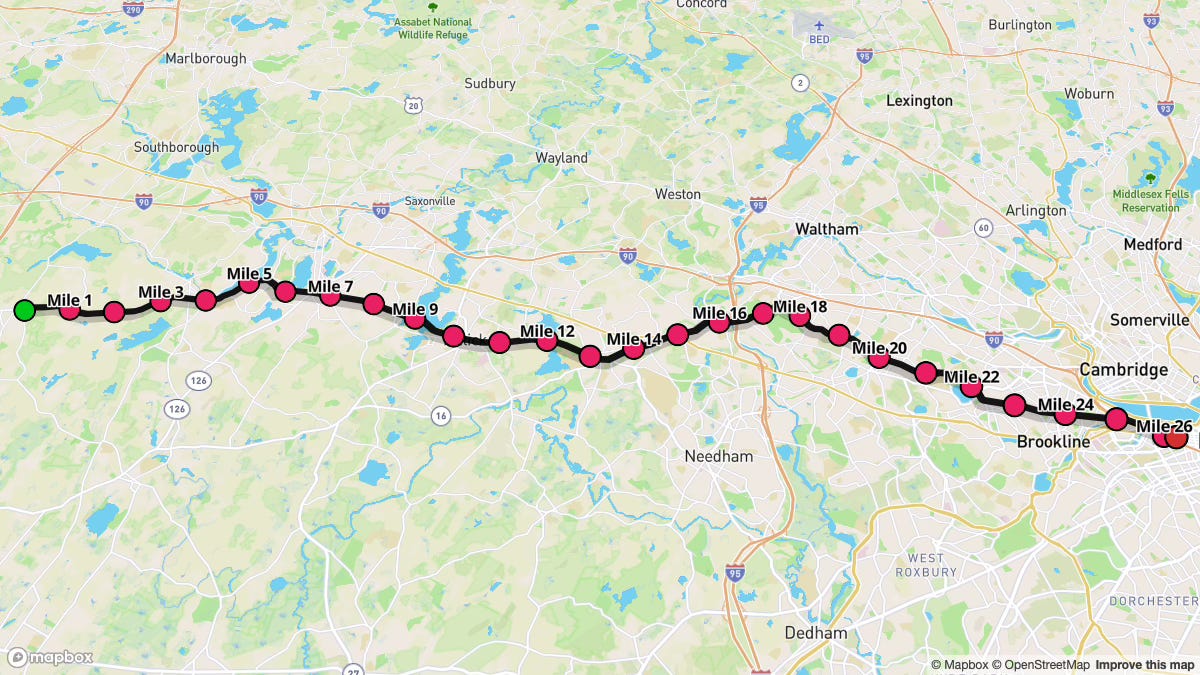
This historic point-to-point course from Hopkinton to Boston is renowned not only for its rich heritage but also for its rolling terrain, massive participant field, and the electrifying atmosphere created by thousands of spectators lining the streets. The race features a late morning start, with Wave 1 beginning at 10:00 a.m. after the elite and para athletes have departed.
Weather conditions at the starting line have historically averaged around 53°F with 58% humidity, clear skies, and a gentle northeast wind. Throughout the day, temperatures generally climb into the mid-60s°F.
Despite an overall net downhill profile, runners should not be deceived. The course is distinguished by its undulating terrain, most notably the challenging Newton Hills between Miles 16 and 21, culminating in the legendary Heartbreak Hill. Successful and enjoyable completion of the race will depend heavily on efficient pacing and strategic energy management throughout these varied elevations.

Key Stats
Event Date: April 21, 2025
Event Type: Road Marathon
Course Length: 26.2 miles
Course Type: Point to Point
TrailScore: 37.73
Road Marathon Difficulty Rating: Easy
Total Ascent: 809.97 feet
Total Descent: 1233.43 feet
Longest Uphill:
Starting at Mile 15.98, 0.72 miles at an average grade of 1.71%
Longest Downhill:
Starting at Mile 23.39, 0.83 miles at an average grade of -1.67%
Steepest Uphill:
Starting at Mile 17.63, 0.31 miles at an average grade of 4.33%
Steepest Downhill:
Starting at Mile 0.10, 0.51 miles at an average grade of -5.22%
Significant Climbs (≥3% grade & ≥0.1 miles):
There are a total of 6 significant climbs on the course.
Significant Descents (≤-3% grade & ≥0.1 miles):
There are a total of 12 significant descents on the course.
Grade Distribution:
Flat: 50.6%
Minor Decline: 20.8%
Minor Incline: 16.5%
Moderate Decline: 7.5%
Moderate Incline: 3.1%
Challenging Incline: 0.8%
Challenging Decline: 0.8%
Course Briefing
Miles 0-5 (Downhill Start through Ashland)
Overview
The race begins in Hopkinton on East Main Street, with Wave 1 starting at 10:00 a.m. You'll experience a noticeable downhill right from the start, with the steepest descent of the entire course occurring in the first mile. The course then transitions to West Union Street as you pass through Ashland. This section is characterized by predominantly minor declines and flat sections, creating a fast initial pace. Expect enthusiastic crowds right from the beginning as you pass through Hopkinton and Ashland.


Key Challenges
Managing the Initial Downhill: The significant early downhills, including a challenging decline in the first mile, can be taxing on your quadriceps. Focus on controlled strides and avoid over-striding to conserve leg strength for later in the race.
Pace Control: The combination of downhills and race excitement can lead to starting too fast. Monitor your pace closely and stick to your planned early race effort, even if it feels easier than anticipated.
Significant Climbs (≥3% grade & ≥0.1 miles)
Climb #1: Mile 0.62 to 0.72, 0.10 mi, avg grade 3.51%, total gain 18.8 ft
Significant Descents (≤-3% grade & ≥0.1 miles)
Descent #1: Mile 0.00 to 0.51, 0.51 mi, avg grade -5.22%, total drop 141.3 ft
Descent #2: Mile 1.85 to 1.95, 0.10 mi, avg grade -3.24%, total drop 17.7 ft
Descent #3: Mile 2.47 to 2.57, 0.10 mi, avg grade -6.91%, total drop 38.0 ft
Aid Stations
Mile 2 (Water & Gatorade)
Mile 3 (Water & Gatorade)
Mile 4 (Water & Gatorade)
Mile 5 (Water & Gatorade)
Points of Interest
Mile 1.1 (approx.): Spirit of the Marathon Statue, a landmark celebrating the spirit of the race.
Mile 0-1.9: Hopkinton, expect very high energy and support at the starting area.
Mile 1.9-4.95: Ashland, continued strong crowd support as you move through this wonderful community.
Miles 5-10 (Framingham & Natick - Settling into a Rhythm)
Overview
Miles 5-10 take you along Waverly Street and West Central Street, through Framingham and into Natick. This section offers a respite from the early downhills, presenting a flatter profile with primarily flat and minor decline grades. It's an opportunity to establish a consistent rhythm and settle into your race. Spectator support remains strong in Framingham and intensifies as you approach Natick.


Key Challenges
Maintaining Focus on Flatter Terrain: After the initial downhill, the flatter sections can feel deceptively easier, potentially leading to a lack of focus on pace and effort. Stay engaged and maintain your target pace.
Subtle Undulations: While generally flat, be aware of minor inclines and declines that can subtly impact your energy levels if you don't maintain consistent effort.
Significant Climbs (≥3% grade & ≥0.1 miles)
Climb #2: Mile 7.63 to 7.73, 0.10 mi, avg grade 4.02%, total gain 21.7 ft
Significant Descents (≤-3% grade & ≥0.1 miles)
Descent #4: Mile 7.83 to 7.93, 0.10 mi, avg grade -3.66%, total drop 19.3 ft
Aid Stations
Mile 6 (Water & Gatorade)
Mile 7 (Water & Gatorade)
Mile 8 (Water & Gatorade)
Mile 9 (Water & Gatorade)
Mile 10 (Water & Gatorade)
Points of Interest
Mile 4.95-7.52: Framingham, a good spot for spectators is around the Framingham Train Depot.
Mile 8.45 (approx.): Henry Wilson Shoe Shop, a historical landmark providing a glimpse into local history.
Mile 7.52-11.72: Natick, anticipate large and enthusiastic crowds, especially around Natick Common.
Miles 10-15 (Wellesley & The Halfway Mark)
Overview
This section, primarily on East Central Street and then Central Street, guides you through Natick and into Wellesley. While still relatively flat overall, you'll encounter slightly more grade variation compared to the previous miles, with a mix of minor inclines and declines. The highlight of this segment is the world-famous Wellesley College "Scream Tunnel," occurring just before the halfway point. The unparalleled energy from the students will provide an incredible mid-race boost.


Key Challenges
Halfway Point Psychology: As you approach the halfway mark, it's crucial to maintain mental discipline and stick to your race plan. Avoid getting carried away by the excitement of Wellesley and conserve energy for the second half.
Maintaining Pace Through Minor Grade Changes: Stay attuned to the subtle changes in elevation. Even minor declines can be deceptively tiring if you push too hard, and minor inclines can slow you down if you lose focus.
Significant Descents (≤-3% grade & ≥0.1 miles)
Descent #5: Mile 11.75 to 11.86, 0.10 mi, avg grade -3.75%, total drop 20.4 ft
Descent #6: Mile 12.57 to 12.68, 0.10 mi, avg grade -3.64%, total drop 20.2 ft
Aid Stations
Mile 11 (Water & Gatorade)
Mile 11.8 (Maurten Hydrogel)
Mile 12 (Water & Gatorade)
Mile 13 (Water & Gatorade)
Mile 14 (Water & Gatorade)
Mile 15 (Water & Gatorade)
Points of Interest
Mile 11.72-15.93: Wellesley, home of the legendary Wellesley Scream Tunnel, a must-experience moment in the race.
Mile 14.64 (approx.): Isaac Sprague Memorial Clocktower in Wellesley, a local landmark to keep an eye out for.
Miles 15-20 (Entering the Newton Hills)
Overview
Miles 15-20, primarily on Washington Street and starting the transition onto Commonwealth Avenue, signal the beginning of the Newton Hills. This section features a mix of flat stretches interspersed with gradually increasing inclines and declines. Landmarks such as Warren Park and the Isaac Sprague Memorial Clocktower appear in this segment. This is where the course begins to demand more from your legs, and strategic pacing becomes paramount.


Key Challenges
Early Newton Hills Effort Management: The initial Newton Hills are relatively moderate, but it's crucial to respect them. Resist the temptation to accelerate on the flats or downhills to compensate for the upcoming climbs. Focus on maintaining an even effort.
Preparing for Steeper Climbs Ahead: Use this section to mentally and physically prepare for the more challenging hills to come. Shorten your stride on inclines and focus on maintaining a consistent effort and breathing rhythm.
Significant Climbs (≥3% grade & ≥0.1 miles)
Climb #3: Mile 16.29 to 16.40, 0.10 mi, avg grade 3.73%, total gain 20.3 ft
Climb #4: Mile 17.63 to 17.84, 0.21 mi, avg grade 5.44%, total gain 59.9 ft
Significant Descents (≤-3% grade & ≥0.1 miles)
Descent #7: Mile 15.47 to 15.78, 0.31 mi, avg grade -5.31%, total drop 86.9 ft
Descent #8: Mile 16.60 to 16.70, 0.10 mi, avg grade -3.08%, total drop 16.7 ft
Aid Stations
Mile 16 (Water & Gatorade)
Mile 17 (Water & Gatorade)
Mile 17 (Maurten Hydrogel)
Mile 18 (Water & Gatorade)
Mile 19 (Water & Gatorade)
Mile 20 (Water & Gatorade)
Points of Interest
Mile 15.47 (approx.): Warren Park, a green space along the course.
Mile 15.93-21.35: Newton, known for its incredibly supportive and energetic crowds that are especially appreciated during the Newton Hills.
Miles 20-25 (Heartbreak Hill and the Toughest Section)
Overview
Miles 20-25 are the most demanding of the course, encompassing the heart of the Newton Hills, including the infamous Heartbreak Hill. You'll be running primarily on Commonwealth Avenue through Newton and into Brookline. The climbs become steeper and more sustained, requiring both physical and mental resilience. Even after Heartbreak Hill, the course continues to undulate. The consistently strong spectator support in this section will be invaluable for pushing through the fatigue and challenges.


Key Challenges
Heartbreak Hill (Mile 20-21): This iconic climb, while not the steepest on paper, arrives at a point in the race where accumulated fatigue makes it feel significantly harder. Maintain a conservative pace, shorten your stride, and focus on reaching the crest of the hill.
Cumulative Hill Fatigue: The entire Newton Hills section is a cumulative challenge. Be prepared for rolling terrain even after Heartbreak Hill, and avoid surging on downhills to "make up time," as this can deplete your energy reserves.
Late-Race Mental Fortitude: By mile 20, fatigue is a major factor. Mental toughness, positive self-talk, and focusing on consistent fueling and hydration are critical to maintaining your pace and form.
Significant Climbs (≥3% grade & ≥0.1 miles)
Climb #5: Mile 19.28 to 19.38, 0.10 mi, avg grade 6.21%, total gain 33.5 ft
Climb #6 (Heartbreak Hill): Mile 20.30 to 20.71, 0.41 mi, avg grade 4.20%, total gain 90.3 ft
Significant Descents (≤-3% grade & ≥0.1 miles)
Descent #9: Mile 21.12 to 21.42, 0.31 mi, avg grade -4.09%, total drop 66.3 ft
Aid Stations
Mile 21 (Water & Gatorade)
Mile 21.5 (Maurten Hydrogel)
Mile 22 (Water & Gatorade)
Mile 23 (Water & Gatorade)
Mile 24 (Water & Gatorade)
Mile 25 (Water & Gatorade)
Points of Interest
Mile 19.17 (approx.): Johnny Kelley Statue, a tribute to a Boston Marathon legend, offering inspiration before Heartbreak Hill.
Mile 21.53 (approx.): Boston College Main Campus Historic District, a landmark signifying you've conquered Heartbreak Hill.
Mile 22.45-24.70: Brookline, continue to expect strong crowd support along Beacon Street as you transition out of the hills.
Miles 25-Finish (Brookline to Boylston Street - The Final Push)
Overview
The final miles take you through Brookline and into Boston, culminating in the unforgettable finish on Boylston Street. After the Newton Hills, this section is predominantly flat and downhill, offering a chance to increase your pace if you have reserves left. You'll transition onto Beacon Street and then make the final turn onto Boylston Street for the sprint to the finish. The crowds in Boston are immense and incredibly loud, creating an electrifying and unforgettable finish line atmosphere.


Key Challenges
Maintaining Form Under Fatigue: Even with the favorable terrain, accumulated fatigue is at its highest. Focus intently on maintaining good running form to maximize efficiency and prevent any last-minute issues.
Navigating Finish Line Crowds: Spectator density increases dramatically in the final mile, especially around the turn onto Boylston Street. Stay aware of your surroundings while soaking in the energy.
Controlled Finish Sprint: The excitement of the finish line is powerful. Resist the urge to sprint too early. Hold back slightly until you are on Boylston Street to ensure you have enough energy for a strong and satisfying finish through the iconic finish line.
Significant Descents (≤-3% grade & ≥0.1 miles)
Descent #10: Mile 22.14 to 22.24, 0.10 mi, avg grade -3.92%, total drop 21.6 ft
Descent #11: Mile 23.08 to 23.18, 0.10 mi, avg grade -3.63%, total drop 19.9 ft
Descent #12: Mile 23.90 to 24.11, 0.21 mi, avg grade -3.35%, total drop 36.7 ft
Aid Stations
Mile 26 (Water & Gatorade)
Points of Interest
Mile 24.70-Finish: Boston Spectator Zone, culminating in the iconic finish line on Boylston Street, the moment you've been working towards.
Mile 24.73 (approx.): Audubon Circle, a recognizable landmark as you enter Boston proper.
Mile 25.25 (approx.): Kenmore Square, another well-known Boston location passed in the final mile.
Mile 25.86 (approx.): Turn onto Boylston Street at Hereford & Boylston, the famous final turn.
Mile 26.24 (approx.): Boston Public Library and Boston Marathon Survivor Memorial near the finish line, significant landmarks at the end of your journey.